Delivering images to clients can be a daunting task. Especially if you want to make a great impression, while keeping your workflow efficient and organized. With the right tools, it is possible to present your work in a way that is both aesthetically pleasing and practical. In this article, I will break down the full process of delivering wedding images to clients that goes beyond Google Drive or Dropbox and offer some insider tips to help you earn extra money too.
In the modern world of photography, ensuring clients have their photos in a timely and quality manner is essential. Professional photographers understand that sending out photos to clients is part of the job and are looking for solutions to make this process more efficient.
What site do professional photographers use to send photos?
There are many options for photographers to deliver photos to wedding clients. From Pixieset, Pass, Shootproof, Smugmug and more. CloudSpot is the choice of many professional photographers including myself. Offering an intuitive and user-friendly platform that makes it easy to deliver wedding photos and other images to clients quickly and securely while still maintaining the high level of quality your clients expect. Sending your clients their photos is important not only for customer satisfaction but also for future business.
How do professional photographers share photos with clients?
Export and Prep your Images
Upload Photos to your Client Gallery System
Customize your Clients Gallery
Choose your Delivery Method
Set up your Print Store
Create a Coupon Code for your Clients
Send your Clients their Gallery and Download Link
Step 1: Export and Prepare your Images
How many photos should a wedding photographer deliver to their client? Short answer between 100-120 images per hour of shooting. If you shoot an 8 hour wedding expect to deliver between 800 and 1000 images. Let’s prepare our photos so they are in the right format and ready for our clients.
PROTIP:My export settings for wedding images is 4000px on the long edge in SRGB color in JPG format at 70% quality. These settings will ensure your clients photos look great on most devices and keep the file size small while still being able to print.
Lightroom Export Settings
These export settings for Lightroom offer the perfect blend of high image quality and small file size!
Step 2: Upload Images to Client Gallery System
One your photos are exported its time to upload them to your Client Gallery System. Simply create a new gallery and upload! CloudSpot integrates with JPGMini to reduce the file size of your images without reducing the quality of your photos. This not only makes your CloudSpot storage go further but it makes for more manageable downloads for your clients too!
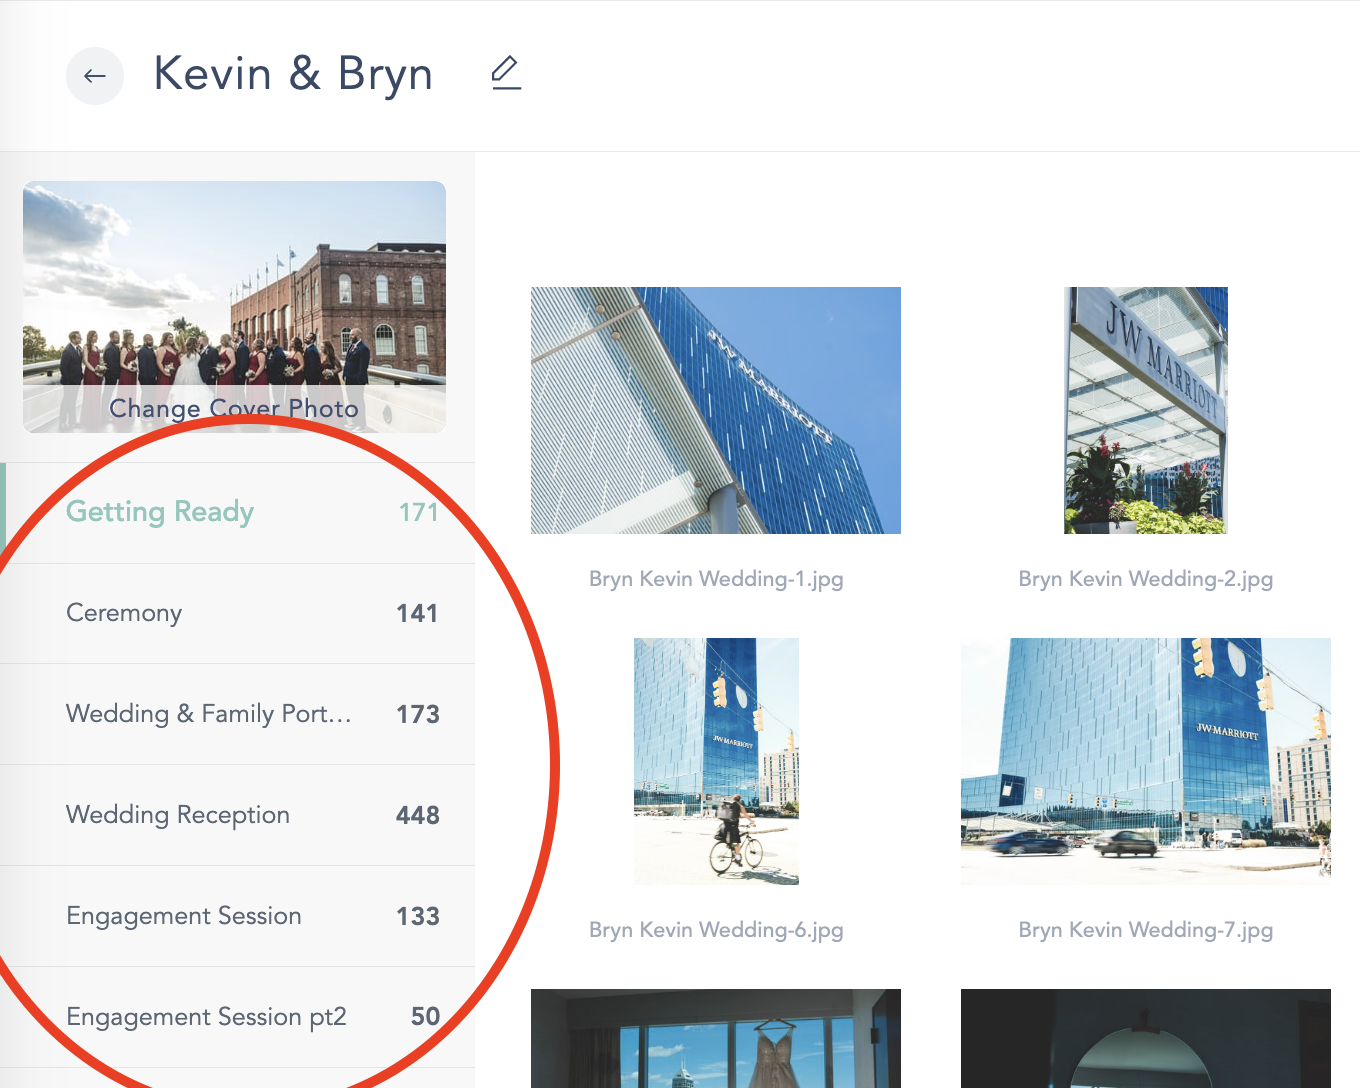
PROTIP: Once all the images are uploaded you can create separate folders for different parts of the day to make it easier for your clients to find the photo they are looking for, quick!
Step 3: Customize your Clients Galley
On top of delivering a gallery that looks more professional than Google Drive or Dropbox, CloudSpot allows you the ability to customize many aspects of the gallery experience for your clients. You can customize aspects like the layout of the whole gallery, the order in which images are shown, what photo you want to use on the cover of the gallery, who gets access to the gallery, and much more!
Step 4: Choose Your Delivery Method
Choosing how your clients will get their photos is an important step in the deliver process. Most wedding couples will want to download all of their images as once. For some clients you will want them to make a selection of images. CloudSpot is the only client gallery system that allows your clients to download all of their photo from a zip file right in the email that you send. This makes your clients life easier.
PROTIP: If you want to protect your photos when sending them to clients with CloudSpot you can also choose to apply a watermark on images that are downloaded.
Step 5: Set up your Print Store
Every year I bring in additional revenue from the parents, grandparents, aunts and uncles of my wedding couples through my print store. Setting up your print store is easy with CloudSpot. From there, CloudSpot's built in Bulk Markup tool let's you profitably price your prints in just a second!
PROTIP: The most popular prints sold are 4x6, 5x7, and 8x10 so be sure to offer those print sizes.
Step 6: Create a Coupon Code for your Clients
One of the best ways to increase print sales is to offer a limited time coupon code to your couples when you send them their gallery. CloudSpot makes it easy to create quick coupon codes with expiration dates. Just make sure when pricing your prints to account for the discount so you can still be profitable.
PROTIP: Offering a 25% off coupon code that is good for 48 hours has given me the best luck in increasing sales after the wedding.
Step 7: Send your Client their Gallery and Download Link
Once the gallery is all set up, it's time to send your clients their photos. You can send an email to your clients right within CloudSpot. And unlike any other client galley system, CloudSpot allows you to include the direct download link right in the email! That way they can keep all of their most important documents in just one place! Other client gallery systems force clients to log in and request a download which can take more than an hour at times before getting their download link.
The Goal: Create a Seamless Experience
In conclusion, if you are looking for a way to deliver wedding photos to clients, CloudSpot is an invaluable asset for photographers looking to provide the best client experience possible. Not only does it make it easy to upload, share and deliver images, but also provides a visually appealing, secure platform for clients to download their photos. It eliminates the hassle of multiple email threads and inconvenient file transfers. With CloudSpot, photographers are able to offer a seamless client experience that is simple and enjoyable. Clients can easily view, purchase and download their images with a few clicks of the mouse.


