Photographing Historic Buildings

Photographing Historic Buildings

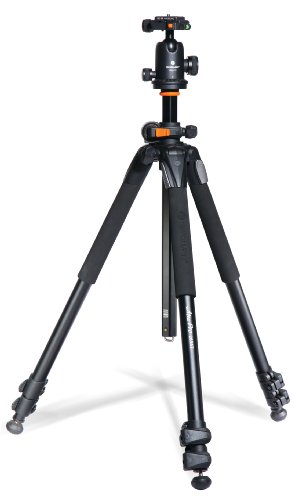
Taking on the mission of photographing historic architecture is a great way for any beginner to learn the fundamentals of photography. Seeing as you won’t need to move quickly to chase around your subjects, do yourself a favor and get a tripod. Apart from stability, tripods can give you the time and space to figure out the best settings on your camera in order to capture the best images.

Another important aspect to note for this type of photography is how to maximize depth of field, an element that can sharpen the sense of space in your photographs. For up-close to medium distance shots of historic buildings, Light Stalking advises using wide angle lenses from 12mm to 35mm so you can shoot from the widest angle of view possible. This is especially useful in cramped cities where other buildings and objects in the street will get in the way of taking shots that include your entire subject.

In relation to this, you should get used to shooting at a smaller or higher aperture and lower ISO, a technique which Tech Radar correctly recommends for maximizing depth of field. Armed with a tripod in such settings, you can freely set slower shutter speeds to get the correct amount of exposure. This particular technique is all about reducing the amount of light that hits the sensor of your camera, forcing you to use as little light as possible – and as much time as you need – to get your perfect shot. Once you get used to shooting buildings from a tripod this way, it will be easier to then experiment with different settings (and angles) as you’ll have more control of the available light.

Another good way for any budding historical architecture photographer to start is by focusing on famous historical structures. This will allow you to compare your own shots with that of famous photographers, which can ultimately provide insight on your personal style and approach to the art of photography. New York City is one place that’s filled with photo opportunities, as it has plenty of places to practice your skills. Apart from NYC’s wide range of iconic buildings, James McGrath from Yoreevo states that in 2015 there were 13,500 buildings that were over six stories within the city. This gives you ample opportunity to photograph buildings that are not famous. You can then compare how well you do with a building that you have no reference for, with a building that has photographed thousands of times. As long as you have your camera and tripod, you can turn any walk or commute through Manhattan into a crash course on architectural photography throughout the different stages of the old city’s history. It’s not uncommon for both tourists and locals to go on this type of photo walk, so the next time you’re in the Big Apple, you can even look for amateur photography groups organizing either free or local teaching tours. If you’re using a DSLR, it would also be a great way to get instant feedback from fellow amateurs and veteran photographers alike.

Finally, you should also try taking pictures of the same subjects in both sunny and nighttime conditions. This can give you a much greater sense of how light dictates the mood of any shot. While shooting in the dark can be difficult, the play of light on historic architecture after dark opens up new avenues of photographic storytelling – valuable insight for anyone who considers themselves to be students of photography. Thomas B. Wilson in his guest post here on The Beginner Photographer advises that "the best way to get a feel for this is to practice and figure out how best to handle the duel between natural darkness and man-made light.”

Want More Photography Tips to Grow Your Skills?

23 Best Photography Youtube Channels To Follow Today

If you are anything like me you learn better through video than text. There are so many resources online to learn photography but Youtube is my favorite. Youtube is hands down the best source for incredible photography tutorials, tips, and even gear reviews. We photographers are visual creatures and youtube caters to the learning center of our brain perfectly. But with youtube being a place where anyone can create and upload content, it can be time consuming to curate a list of photography channels you must subscribe to that will provide endless recurring content. So I did the hard work for you so you can get back to shooting! The Youtube Channels below are in no particular order and no one is better than another. If you subscribe to even half of these youtube channels I guarantee you will be busy enough to catapult your knowledge of photography.


1: SLR Lounge

The SLR Lounge youtube page is an extension of the popular SLR Blog. Their youtube channel is full of tips for wedding and portrait photographers. From Posing and lighting to editing and gear talk, SLR Lounge has something for just about everyone new and experienced with a camera

Product Link: http://www.slrlounge.com/store-product/natural-light-couples-photography-workshop-dvd Music: "Aerials" from LIGHTS & MOTION "Reanimation" (Deep Elm) http://www.deepelmdigital.com/album/reanimation License this song at http://www.themusicbed.com Article Link: http://www.slrlounge.com/school/posing-basics-v Download a Free Engagement Photography Guide: http://www.slrlounge.com/engagement-free-download All Images Copyright Lin and Jirsa: http://www.linandjirsa.com/ http://www.linandjirsablog.com/

2: Photos in Color

Photos in Color is a unique Youtube channel. While there are plenty of on location photoshoots there is a wide range of lightroom and editing tutorials too. Eds has a great way of communicating difficult ideas for newer photographers in a clear and concise way that everyone will understand. This makes Photos in color a must subscribe!

In this Lightroom 6 Video tutorial i show you have to make selects in Lightroom. Using Lightroom Flags Lightroom Stars and Lightroom ratings you can quickly categories your photos in Lightroom CC. Lightroom ratings is easy and will speed up your Lightroom workflow.

3: FStoppers

If you are unfamiliar, FStoppers is another popular photography blog. Their youtube channel has some real Gems. From their community critique series, their Photographing the world series, and tons of behind the scenes videos, it's clear they are committed to producing quality photography education

read the full post here: https://fstoppers.com/originals/how-many-megapixels-do-you-need-print-billboard-220239 Check out our full photography tutorials here: http://www.fstoppers.com/store You don't need very much resolution to print a billboard. Due to the viewing distance, and the resolving power of the human eye, 2mp may be more than enough resolution for the average billboard.

4: Taylor Jackson

Taylor Jackson not only is a past guest of the Beginner Photography Podcast, (Click Here to Listen) but he has one of the best youtube channels focused on photography. From his “A Photographer In” Series where is travels the world and shows you how he takes the amazing photographs he takes, to mounting a gopro to his camera and taking you along with him to full weddings where you can see his camera settings while hes shooting. Taylor Jackson is always coming up with new and interesting photography videos that keep you captivated.

New wedding photography marketing video every Monday: http://www.patreon.com/taylorjackson (These are the videos that will book you more weddings) My full length courses: https://www.taylorjacksoncourses.com/ Presets: http://www.taylorjacksonblog.com/lightroom-presets/ My usual wedding day gear list: Main Body: https://amzn.to/2JVlsl4 Second Body: https://amzn.to/2ro468V Wide lens: https://amzn.to/2rt5KGu Alt wide lens: https://amzn.to/2IezKAf Portrait lens: https://amzn.to/2HUUUUq Ceremony lens: https://amzn.to/2jyvTzP SD Memory cards:https://amzn.to/2rnuArX Today I was using the 135mm Sigma, and Nikon 28mm F1.4.

5: Peter Mckinnon

Peter Mckinnons popularity on youtube has exploded in the past year and its clear to see why. Peters videos have incredible content and production quality. With so many tutorials you are bound to not only learn something but you will be incredibly entertained! His photography vlog is also insightful and educational! Some of Peters tutorials are not incredibly in-depth but I’d be lying if I told you I hadn't picked up a tip or two from him.

What is a picture profile? What is the best profile for cinematic footage? Dynamic Range? Flat, log? Questions answered in todays 2MT!

6: Nigel Danson

Nigel is a landscape photographer who does an incredible job at taking us along with with him as he shoots some of the worlds most beautiful locations. He talks us through whats going on in his head and why he's making the decisions he's making. When it comes to landscape photography there is a huge difference between good and great, and Nigel shows you what it takes, the mindset to have to be great.

I was lucky enough to photograph the spectacular northern lights in Iceland. In this video I speak to Aurora expert Mads Peter Iversen about his top tips for shooting the Aurora and share my camera settings for great Northern Lights photos.

7: Craft and Vision

David duChemin is a world renowned photographer who has shot on assignment in all 7 continents for just about every publication over the past several decades. Craft and Vision is a weekly themed video series aimed at helping you forget about megapixels and focusing on the art of photography, the connection you can make through photography, and the story you can tell through photography. Andrews videos are incredibly thought provoking and equality enjoyable. This is a must subscribe channel!

Is Composition more important than a great moment? I think it's the wrong question. Join me as we discuss that and why I don't believe that anyone truly shoots intuitively (spoiler: they might, but they had to train that intuition and you can too!)

8: Advancing your Photography

Host Marc Silber is another guest of the podcast, you can check out his interviews back from interview 65 ( Click Here to Listen ) and 97 ( Click Here to Listen ). Marc has been shooting since the 1960s and I am thankful that with the internet we have a place for him to share his incredible knowledge of photography with the world. He interviews some of the worlds best photographers like Annie Leibovitz, Bob Holmes, and Joe McNally.  Marc has a knack for asking the right questions that challenge both the photographer he is interviewing and the viewer.

You've watched Lighting Tips Pt1, now here's even more lighting tips with award-winning photographer Bob Holmes. In this video, Bob explains why he rarely uses flash in his photographs, plus he offers tips on how to combine light sources, use only internal light and much more.

9: Thomas Heaton

Thomas Heaton is a favorite among landscape photographers both experienced and new to the genre. Thomas’ videos are like watching him achieve a goal. They start with an intro, why he wants the shot, the challenges, the gear, the journey to the location, arriving, and then tips on how he achieves the shot he wants. His videos are more vlog style than purely instructional but that behind the scenes shows the reality of what it takes to get a worthy landscape photo.

Location: Haweswater Reservoir, Lake District Date Shot: 16/01/2016 My E-Book: http://geni.us/onlocation FAQ: http://www.thomasheaton.co.uk/faq/ Social Medias: Facebook: https://www.facebook.com/ThomasHeatonPhotography Flickr: https://www.flickr.com/photos/thomasheaton Twitter: https://twitter.com/theatonphoto Instagram: https://www.instagram.com/heatonthomas/ Music: Jazz Street - Niklas Ahlström Never Say No 1 - Peter Sandberg Vanilla Urban 2 - Niklas Ahlström My Kit List: Canon 5D MKIII - http://geni.us/5DIII

10: Karl Taylor

Karl Taylor is a commercial advertising photographer and educator. Spend just 5 seconds watching any of his videos and its clear he is extremely knowledgeable about lighting and product photography. Karl often brings you into his studio where he shows you why a single bottle of whiskey can take a dozen lights to photograph. Karl not only shows you how to shoot it right in camera, but he then will show you how much work the image takes in photoshop to polish it. Even if you are not a product photographer seeing how another photographer sees and uses light is invaluable.

Watch this pro-level studio product photo-shoot right now! https://www.karltayloreducation.com This type of shot is normally considered complex because of the interaction of light with liquid and glass. I run you through this studio bottle shoot step-by-step and reveal some professional tips for achieving this type of image.

11: Phlearn

Phlearn is one of the best sources for all thing photo editing in lightroom and photoshop. Some of the tutorials are incredibly complex and get very in depth. Thankfully the host Aaron has mind reading capabilities can knows which parts of his tutorials are most complicated and he does a great job of slowing down to explain the process and why it works the way it does. And luckily he has a personality that makes learning fun and engaging. Phlern has tutorials on everything from what every button in adobe lightroom does to how to make a Stranger Things poster image in Photoshop. This tutorial on retouching babies skin might be one of the most useful and popular.

I Guarantee I Can Teach You to Master Photoshop. Learn How: https://phlearn.com/aaronwillteachyou Aaron guarantees he can teach you to master Photoshop! Learn more here: https://phlearn.com/aaronwillteachyou2 Our quick guide to helping newborns look their best! Download the Sample Image here: https://phlearn.com/tutorial/retouch-newborns Welcoming a new life into the world is a profound moment that deserves to be captured and shared.

12: Chase Jarvis

Chase Jarvis is a world famous photographer for some of the biggest sports and adventure brands and creator of the popular website Creative Live. Chase hands down is one of the most positive and motivational people I have ever seen. He shares experiences that he has encountered while behind the camera to motivate and inspire photographers of all skill levels. His presence is perfect for his youtube show Chase Jarvis RAW. Chase not only interviews world famous photographers but also some of the world’s top thought leaders like Richard Branson, Daymon John, and Tim Ferris.

Hey introverted friends -- I see your comments on how participating in the community can be tough. I get it! Believe me -- it's a skill you can master with practice. Here are three tactics to get you started... New episodes weekly.

13: B&H Photo

If you dont know, B&H Photo is the worlds largest camera store. Located in New York City the store is more than 70,000 square feet and more than 10,000 products that you can put your hands on and try. Their youtube channel is full of useful product demos that will surely help you when feeling indecisive. The real meat of the B&H youtube channel is their “Event Space” series where they record hour long+ lectures and training by some of the worlds best and most proven photographers. It is not short form content, the guest has more time to go in depth on their topic which will give you a better understanding. And when tackling complex topics like “Are you expressing your creativity or just pressing buttons?” the extra time and long form conversation is refreshing!

Do you feel like there is creativity hiding inside of you, but are not sure where to find it? There are endless tutorials on taking pictures, but how do you figure out what to shoot in the first place? In order to develop a unique point of view, we have to understand how creativity works.

14: Adorama TV

Adorama TV is another camera retailer like B&H but that’s about all they have in common when it comes to their youtube content. With close to 3,000 videos and over 1,000,000 video views a month it’s obvious that Adorama TV makes some incredible tutorials and content for photographers. Adorama TV has a slew of video series and you are bound to find several that really appeal to you. One of my favorite hosts Mike Wallace shares a ton of great tips about lighting that will get you thinking differently.

https://www.adorama.com It doesn't matter what camera you have, doing one simple thing will make your photos better. Get closer! Just get closer to your subject by moving your camera closer, or zooming in when shooting portraits. Create an emotional connection by getting close.

15: The Art of Photography

If you are interested in anything film related, print related, or anything about taking photography to a level higher than point and shoot, the Art of Photography is perfect for you. Ted Forbes hosts interesting discussions about what makes a photograph interesting and artistic. His views passionate yet open. He makes it clear that there is more than one way to do something right and plenty of opportunity to improve and grow as a photographer. While Ted Forbes has helpful reviews on cameras and whatnot I think the most power comes from his many videos that get you thinking and asking yourself questions about your own work.

Nobody cares about your photography. The world doesn't need any more photographers. It doesn't need anymore musicians, writers, filmmakers, artists or actors either. We have enough. Its over-saturated. BUT The world's survival is completely dependent on work that matters. Subscribe for more videos!

17: Mango Street

Having created their youtube channel for photographers just over a year ago it’s quite incredible that they have amassed well over half a million dedicated subscribers. Watch any of their more than 100 videos and you will immediately understand the appeal. Their quick and to the point defined videos mean there is fluff and no time wasted learning what you are looking for. Their unique editing style and chemistry together make each video incredibly entertaining to watch.

Check out Part 2: https://youtu.be/siXciriEuCo Video graded with Mango Street LUTs ► bit.ly/MangoLuts In this video, we'll show you how we pose single subjects, so you can get the most out of your friends and clients who aren't models. Thanks to Megan Gulotta for being our non-model model.

18: Eric Kim Photography

Eric Kim is a street photographer who is not scared to strap a GoPro to the top of his camera and ask people walking by to take their portraits. Eric also shares photography tips like composition for street photography while he traces over his photos on an iPad making them pop. Eric answers lots of questions about being bold and stepping out of your comfort zone when out on the street that will be sure to help you when starting out.

You can see my first Chicago Street Portraits POV video here (#1) https://www.youtube.com/watch?v=FGGoPSYFcHQ You can see my second Chicago Street Portraits POV video here (#2) https://www.youtube.com/watch?v=Ej8VijWcY9M -- Blog: http://erickimphotography.com/blog Facebook: http://facebook.com/erickimphotography Twitter: http://twitter.com/erickimphoto

19: Jessica Kobeissi

Jessicas channel is unique for sure. Some photographers make a single video of how to shoot in an ugly location but Jessica has a whole series on shooting in ugly locations, shooting with dollar tree items, cheap ebay dresses, and multiple photographers shooting the same model. Her channel offers fun creative ideas and different perspectives to prove that even with nothing, you can come up with a creative photo shoot.

Here are 6 creative photoshoot tricks that any photographer can use!

20: Jamie Windsor

Jamie is a UK based wedding photographer but dont let that stop you if you don’t shoot weddings! With videos ranging from “9 tips to getting better black and white photos” to “Why your ideas arn’t original” Jamie really has something useful for every photographer.

A look at a common cognitive bias that makes people think they're better at things than they are, and how you can avoid succumbing to this psychological trap.

21: Evan Ranft

Evans Channel has some great offerings for the younger viewers who are interested in photography and travel through social media. With tutorials on getting high quality photos on instagram and editing iPhone photos with VSCO he caters to a crowd who wants freedom from a computer and still be able to live an adventurous lifestyle. But don't skip his channel just because you're over 30, Evan also has tutorials on 14 Great lightroom tips AND the linked video below what to expect and how to prepare for your first photoshoot.

Today we are going over everything you need to know about your first photoshoot and getting paid. Thanks to today's video sponsor Skillshare.

22: Nathan Elson

Nathan Elson is a Calgary Alberta commercial photographer who may not upload nearly as often as the rest of the youtube channels on this list, but what he does upload is pure gold. Nathan is a master at bringing you into his busy studio and walking you through what’s in his head when it comes to lighting and camera technicals as well as the challenges of what it’s like to be a busy working commercial photography.

CUSTOM LIGHTROOM PRESETS: http://www.nathanelson.com/presets Follow me on Instagram: http://www.instagram.com/nathanelson All images shot with the Fuji X-Pro2 + XF 56mm f/1.2 Video shot on the Panasonic G7 + 12-35 f/2.8

23: Irene Rudnyk

Irene, like Nathan Elson is another Canadian photographer. Irene focuses on fashion photography but with a more home grown portrait flair. She is great at what she does, just check out her underwater photoshoot! But Irene knows her audience well enough to create videos like the one below all about what goes into having a home studio.

DIY Backdrop video https://youtu.be/teOumdojPx4 Expansion video https://www.youtube.com/watch?v=qTxup4hBdYY&index=15&list=PL943Oniu8QaMy825D6kZcfoainWs6If59 Backdrop Stand http://strobepro.com/products/background-stand-kit-with-case Continuous Light http://strobepro.com/collections/continuous-lighting/products/quadstar-1000w-continuous-light Vlog Channel : https://www.youtube.com/channel/UCe3EHowrKcqpuf-ImVsTDVA my info http://www.irenerudnykphotography.com/ FB https://www.facebook.com/pages/Irene-Rudnyk-Photography/237250669669199 instagram @irenerudnykphoto 500x http://500px.com/irenerudnyk tumblr http://irenerudnykphotography.tumblr.... vk http://vk.com/irenerudnyk fashion blog http://irenesbazar.tumblr.com/ email irenerudnykphoto@gmail.com Music: it's alright (i'm alright) vbnd https://soundcloud.com/vbnd/its-alright-im-alright-kinda

BONUS! 24: The Beginner Photography Podcast

Lastly, our channel, the Beginner Photography Podcast. On top of posting every recorded podcast interview this year has seen an effort into posting more tutorials to helping grow your skills as a photographer like creative challenges and dealing with digital storage and show you how to focus less on what doesn't matter.

Join The Beginner Photography Podcast Facebook Group - https://www.facebook.com/groups/1278078252272020/ Top 21 Best Photography Podcasts - https://www.fuelyourphotos.com/best-photography-podcasts/ Free Video Course! Photography Basics For Beginners: 14 Days to Better Photos - https://www.beginnerphotographypodcast.com/photography-basics-for-beginners-free-course

Like I mentioned earlier, there is no shortage of great photography resources on youtube! In fact, if you scoured youtube non stop for the next year I’m sure you could learn everything you need to find a successful photographer. But in case you don’t have that much time and you want to learn photography in an easy to follow, free camera settings ebook, sign up below!

The Ultimate Beginner Photographers Guide to Composition

composition-for-new-photographers

If you have ever looked at a photo and thought “wow this is a really good photo” but couldn't figure out WHY, it’s probably because the photo had a solid composition. What’s great about that is that, I’ve said this a million times, learning and practicing composition has nothing to do with how good your camera is. You can get better compositions with the cell phone in your pocket!

Composition is first step to mastering your photos. Anyone can get the technicals if they keep with photography long enough but few continue to try and see the world around them in a new way to find interesting compositions. Sometimes you have to get low, or high or jump 2 steps to the left to get the perfect frame.

The challenge with composition is that you want to be close enough to tell a compelling story. If you’re too close, your will not have enough information on what’s going on. If you’re too far away the photo will not be compelling as it will not have enough impact.

First What is composition?

Google defines composition as “the nature of something's ingredients or constituents; the way in which a whole or mixture is made up.”

photography-composition-definition

Like I mentioned earlier composition can be practiced and mastered anywhere with any camera. I’m sure at some point in your life you have looked at an iPhone photo and thought that it was better than anything you have created with your DSLR camera. The answer is composition.

Are you getting the bigger picture here?

A great photo is not all about having a wide aperture or telephoto lens or newest camera body that lets you shoot at 14 frames per second.

So let’s break down composition. In photography I look for three things to make a strong composition. The Rule of Thirds, Framing, and Leading Lines. Adding any of these elements into your photos will make them more compelling to look at.

1: The Rule of Thirds

The Rule of Thirds is perhaps the most well known compositional tool. Its built into every modern cell phone. Think of an imaginary Tic Tac Toe board laid on top of a photo. Science has found that where the vertical and horizontal lines intersect is where your eyes naturally find pleasing. So placing your subject within the intersecting points will make your photo more enjoyable to look at.

Beginner

Within but like most things, it’s simple to start and difficult to master. Starting with the rule of thirds you can simply just angle your camera to the left or right to put your subject in the intersecting line. As you can see in my example below, I went to take a photo of my son Charlie and just angled the camera more to the left to place him in the right third of the frame. Simple.

Simple-Rule-of-thirds

In my next example, I did the same thing with my daughter eating some fruit. I angle the camera down so her face would be in the top left third and her hand reaching for the plate was in the bottom right third. Easy Peasy.

portrait-rule-of-thirds

Intermediate

Already your photos are starting to look better but you want to take it further. This is when you start to add more context to your photos, Whats going on, where are you, etc. The first photo you see our son has no cavities (woohoo!). So I placed him in the lower left third, but to add more context I wanted to include the dentists' sign. I took a step back and brought the sign to the top right of the frame. Now we have more of the story!

intermediate-rule-of-thirds-dentist

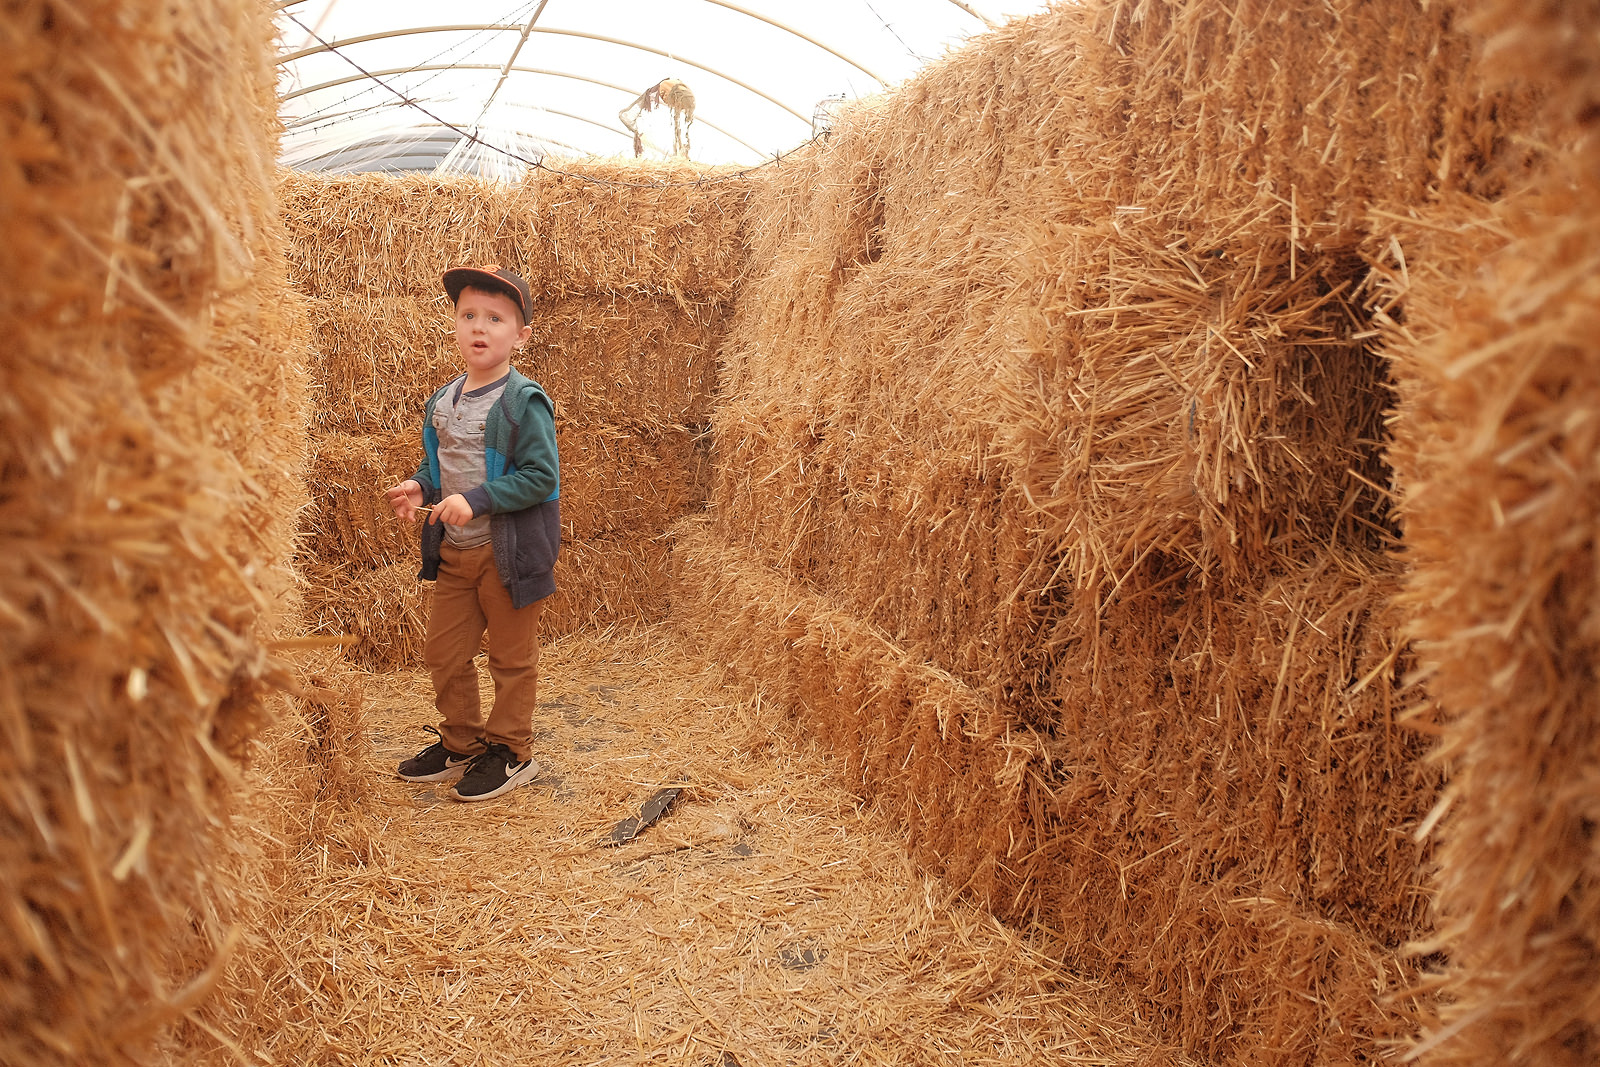
In the next example you see Charlie standing in the middle of some hay. But by taking a step back you can see he’s in a maze by the stacked hay walls and his confusion only adds to the interest because it tells more of the story.

boy-standing-in-hay-maze-rule-of-thirds

Advanced

Once you start getting the hang of adding more content you should be ready for the advanced course on the rule of thirds. Creating your own. Sometimes placing your subject in the intersecting lines is not interesting enough. Stepping back to add more context adds a bit more but the photo is still lacking something. This is where simply waiting for the right moment comes into play. Waiting for the right moment for movement or your subject to do something interesting is creating your own photo that is not reactionary but it's being proactive. In my example below. Parker was drawing in her book intently and it was adorable so I wanted to take a photo but it just was not coming together. I had to either get high enough to see that it was a coloring book and lose her face or get low enough to see her face but lose the fact that she was coloring. This is where patience comes in. I found a low composition I like. I waited until she was done with the current page and went to flip to the next to snap the photo. The added context that she is coloring really makes this photo a joy to look at as it tells the whole story.

little-girl-reading-coloring-book-christmas-tree

The next photo may be looked at as Framing but stick with me. I placed Charlie getting a haircut in the lower left but I found the flag separator things distracting even though I thought they would add simplicity. So I looked around to see how I could add more of the hair station to the photo, and I couldn’t without losing Charlies face. That’s when I saw the mirror, placed it in the lower right and snapped the photo. Now, this is not a great photo. I’m too far away to get the full effect of the reflection but the point is to show you to look around for what else you can add to the photo.

little-boy-getting-haircut-reflection

2: Framing

You can make any photo more compelling by using the rule of thirds as it requires nothing more than a camera and a subject. Framing your subject is the next step as it requires something extra. A frame! What can you use for a frame? As you’ll see in the examples below, you can turn just about anything into a frame! A frame is used to draw your attention to your subject. Sometimes isolating them in the frame, other times highlighting them. The point here is to make your subject stand out! I find when I see a frame, I love to turn the photo into a portrait which for me often does not follow the rule of thirds. But hey rules are supposed to be broken right?

Getting started with framing, once again, can be pretty easy. In my first example below you can see Parker was waving goodbye to me. She was already framed in between the curtains but I placed the camera where the windows framed her in the center of the photo. Done.

Little-girl-waving-goodbye-through-window

Same with the next example. Charlie was jumping on the trampoline. I simply waited until he was in the center, I moved to where he would not be blocked by the safety poles and took the shot. There is nothing magical here, but simple framing to get you started.

boy-jumping-aroung-snow-covered-trampoline

Intermediate

You will quickly see that anything can be used as a frame. Taking kids to the park is my favorite. They get out a ton of energy and I get to stretch my creative muscles. You see Charlie coming up the tube. The inside of the tube is dark, but at the end of it is bright. Charlie's body creates a silhouette that frames him in the photo. That alone would be a beginner framing technique. Adding in Parker looking at him gives more context. It shows they are playing together and having fun. It shows that the photo is more than just me asking Charlie to go in the tube so I could frame him in a photo.

brother-and-sister-playing-at-park-pink-jacket-green-tunnel

The next example is from Charlie’s birthday at Chuck e Cheese. The kid is always in awe of how many awesome, fun, and colorful games they have. When he walked up to this one, I knew from behind you would be able to tell how focused he was on the game, so I used the games symmetry to frame him in.

boy-playing-neon-pink-green-blue-arcade-game-silhouette

Advanced

Now we are getting it. It’s time to start experimenting with frames while adding more context. Here Charlie was at the top of the playground looking over the rest of the park. You can see the interesting curves of the structure, the simple colors that are not too distracting, and the roof behind his head with lines that draw your eyes right to his. Like I mentioned earlier, this is more of a portrait because it would not hold the same weight if I moved him off to the left or right to incorporate the rule of thirds. BUT you will see that his head is on the top line, and his feet are on the bottom line. So while they are not intersecting, Im still aware of the Rule of Thirds.

boy-standing-on-top-of-green-tan-park-playground

In this photo, you can see Charlie throwing packing peanuts all over the kitchen having the time of his life. This photo was a tough one to take because as you can see the cabinet to the left really blocks off most of the action. But I used that empty space to frame Parkers head in there. Again adding more context. Try to look at this photo and imagine Parker was not in it. The photo would be incredibly boring because I would be too far away for the action. It would not be compelling. I’m not saying this photo is extremely compelling but adding Parker in the foreground looking at her brother turns this photo from a dud to a keeper because it adds to the story.

boy-throwing-packing-peanuts-all-over-white-kitchen

3: Leading Lines

Leading lines are something in the frame that can bring attention to your subject. Think of someone standing in the middle of a road that vanishes off into the sunset. Leading lines can be super subtle or very pronounced. It’s a way once again to draw your eyes right to your subject. Leading lines is the last step because it can be the most difficult. Your eyes do not naturally see leading lines. You brain does but continuously you don’t even notice them. You need to train your eyes to see them and capturing them almost ALWAYS means moving the camera to a place you didn't think of. Either higher or lower to perfect the angle or closer or further to make the lines more or less pronounced.

Beginner

In this photo, you see Parker looking at the camera, but the window frame starts from the corner and goes right to her eyes. I moved the camera right next to the window to make the line more pronounced and then brought the camera down so that the line went right to her eyes.

baby-girl-in-red-shirt-looking-at-camera

Here you see Charlie dressed up for Halloween and the sidewalk is creating the leading lines that go directly to his head. To grab this shot I had to get the camera down to his level once again otherwise the sidewalk lines would have gone to his hips and that’s not interesting. Then I just framed him in the middle to maximize the effect of the lines.

boy-dressed-up-as-mario-for-halloween

Intermediate

Ok the basics are covered. Now is where you start experimenting once again to get unique lines and start to incorporate the other compositional tools. Here you see Parker was sitting on a ramp. By simply lowering the camera to the ground, the ramp created the leading lines that went right to her. Then I also placed her so that she was being framed by the tube behind her. This photo could have also worked with the rule of thirds. Mainly because of the frame behind. If she was not framed, I'm not sure it would be as compelling. That’s why this is more intermediate.

toddler-playing-at-park-in-fall-blue-ramp

Once you start using leading lines you will see them everywhere. This is a great example. How many times have you been to the store and not recognized the shelves as leading lines? By just moving your camera up or down you can place the lines where you want. I wanted them to go to Charlie’s head since that’s where the action is. I found it and I snapped it. Here I am also incorporating the rule of thirds. Charlie is in the Top right of the corner, the phone is in the bottom left and the shelf draws you attention from one side to the other.

boy-on-phone-with-santa

Advanced

The advanced lesson on leading lines is looking for things that are not lines to turn into lines. Starting off with something simple, you see Parker pointing to an ornament that we would not let her play with. Getting on her level here ads to the story. Getting close to the ornament, effectively making it larger in the frame adds to the story as well. The photo starts with us looking at parkers sad face. We want to know why she’s sad. We follow her arm that I waited for her to reach out pointing right to the ornament. Suddenly we get it.

toddler-girl-playing-with-red-christmas-orniment

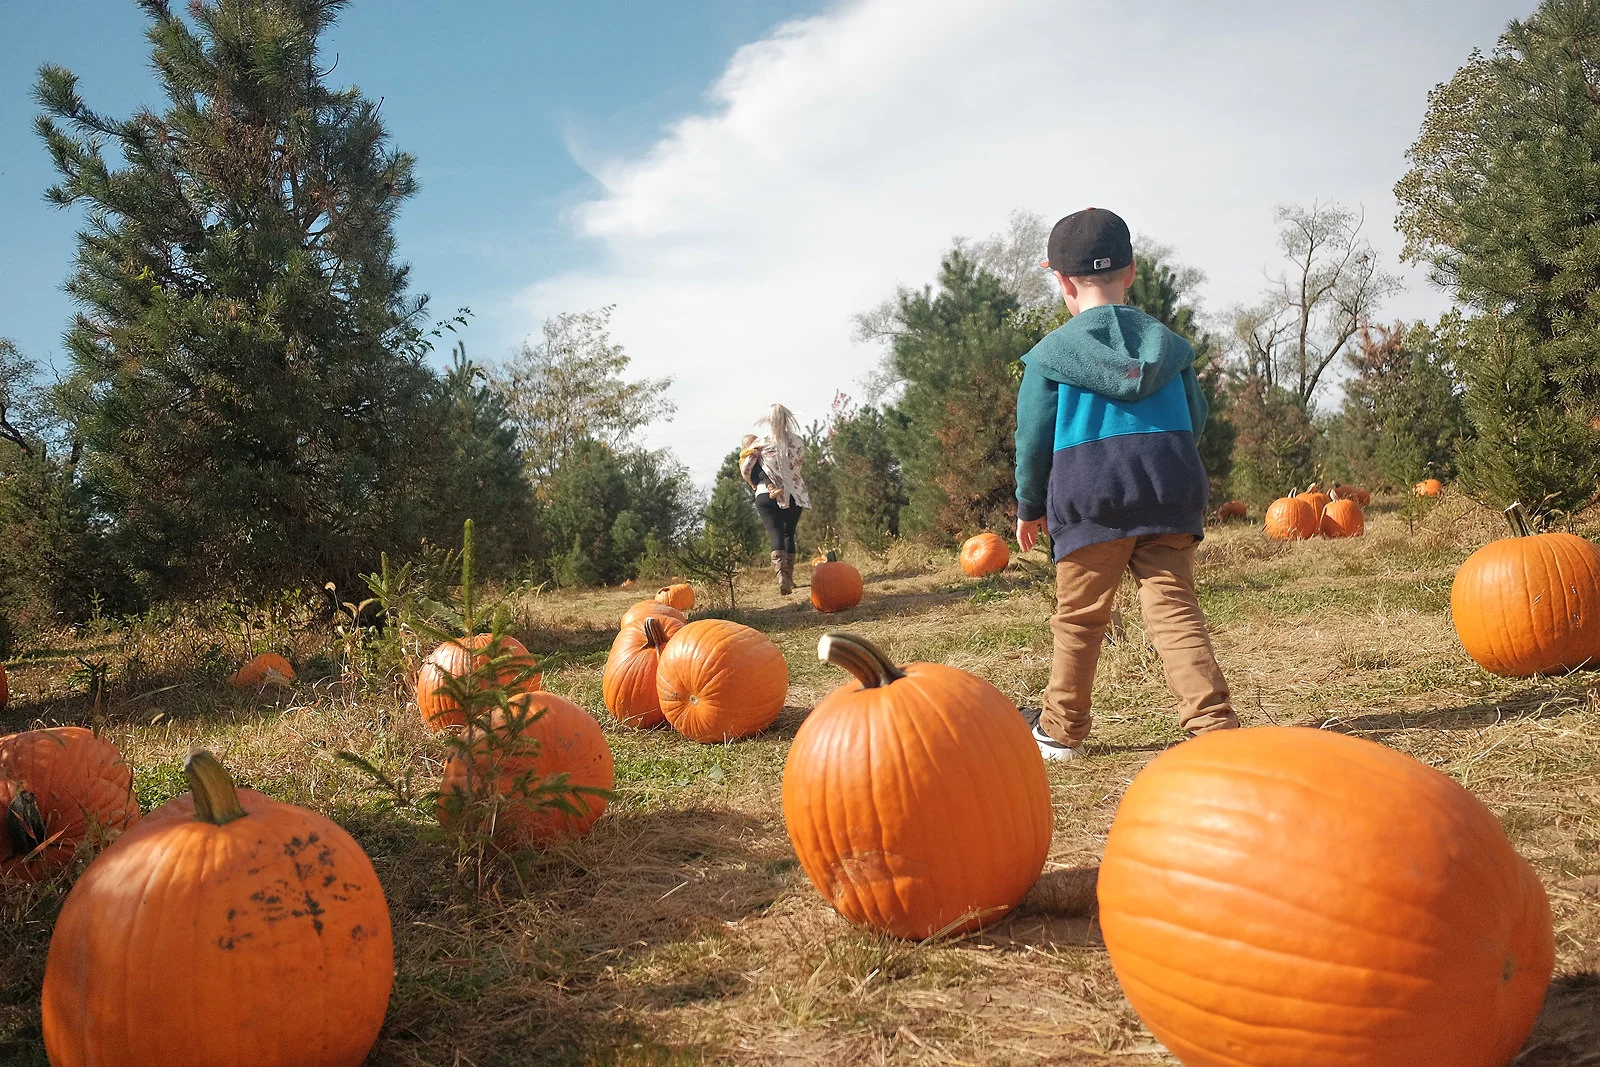
Next, again this photo is not particularly good but it’s to highlight a point. These pumpkins are round. They are balls. The furthest thing from a straight line. But by getting the camera low enough I have created a line that your eye can see. With Charlie in the right of the frame, and the line moving up and to the left we now see mom and Parker further down the trail. Don’t be afraid to move your camera around to find something unique.

walking-through-pumpkin-patch

The TRIFECTA!

We have made it. You have learned how the Rule of Thirds can make your photos more pleasing without any additional outside influence. You have learned how framing your subject makes them stand out in a sea of business. And you have seen how leading lines can add interest and weight to your photos. Now is the time we bring it all together. The more compositional tools you bring together in one photo the more powerful it becomes. So what does it look like when you have all 3 combined into one photo? NOTE: just because a photo has all three compositional tools, does not make it a perfect photo as you will see below.

Sometimes you get a “Happy accident” This was shot with a GoPro. I was not paying attention to the screen. I simply had the camera in burst mode, held it down at Parkers level and snapped away. Here you can see the water creates a leading line and is framing here in. On top of that, the sun is also directly behind her creating another frame with her on the right side of the frame loosely in the rule of thirds.

baby-playing-at-water-park

This was another photo I just snapped and it was not until later that I dissected it and saw it included all 3 elements. Charlie is in the lower left third framed by the fence and the water behind it. His arms are leading up to the raft elevator in the top right of the frame. Is this photo a show stopper? No, but its compelling enough to figure out the story of Charlie waiting for a raft to get into for his turn on the slide.

boy-waiting-at-water-park-raft-ride

Here we have Parker, on the lower right of the frame being framed into the shadow of the couch with the pillows creating leading lines right to her eyes. The whole story is not here. She was sick and falling asleep on the couch and I was trying to capture that and I couldn't really. I tried, I added all three elements and still the photo falls flat.

little-girl-sick-laying-on-couch

I love this one. It’s my wife and son Charlie talking about how much fun we had that daw while enjoying the warm summer evening. My wife in on the right third, Charlie is more towards the middle but it doesn't bother me. Their silhouettes are framed by the lit fence in the background which is also creating a bond between them with them lines of the fence.

mon-and-son-silhouette-backyard-night-time-lights

If this isn't interesting I don't know what is. This show was much more intentional than the previous. Here is Parker in the lower left of the frame, being framed in by the door, looking outside waving at mom arriving home in the driveway. With the lines of the window and the front step outside leading to Parker. This tells a full story.

little-girl-waving-goodbye-to-mom-through-door

This photo was also intentional. Charlie is framed on the right side of the frame by the carpet in the background with leading lines of the shelves taking you right to his eyes. I could have got lower to get more emotion and framed his head into the tiled path but uh…. You live and learn. I'm not perfect.

boy-in-teal-shirt-picking-out-movie-to-watch

This has to be one of my favorite photos I took last year. I think it’s just about perfect. I don't even think it needs an explanation. But if I could go back and do it again, I would try to move the camera more to the right to frame out the closet door their in the center.

happy-baby-laughing-over-baby-gate

Wrap Up

I want you to walk away from this feeling inspired. I had to go through a year's worth of photos to find these 25. And even then some are still not great photos despite using the compositional tools. Why should that inspire you? Well because it means that there is a whole world of photography out there to explore and master. Even after 10+ years shooting, I still work on my craft every day. Maybe next year I will take 27 photos I would be happy to show off as examples. It takes time and patience but you are clearly taking the right steps to better yourself and grow your skills as a photographer.

Camera Gear Guide: Buying New Vs Used

Photography can be an expensive hobby. If you want to use something more than the cell phone in your pocket and get a DSLR, buying a brand new current entry-level camera can start at more than $700. So to save money should you buy a pre-owned used camera? I think if you are not using your camera professionally (and in some cases even if you are a professional photographer) you should buy your camera gear second hand. Here are my reasons why and what potential issued to look out for when purchasing used camera equipment.

*Disclaimer: This post contains affiliate links. I will receive a commission if you make a purchase through one of these links. I personally used the products and services I recommend*

So… Why not buy used gear? I hear you, what if the previous owner treated their cameras poorly? A second hand camera doesn't come with a warranty. What if there is a scratch on the lens that I couldn’t see in the ebay listing? What if the lens is in good cosmetic condition but the autofocus is broken? Newer cameras have 5x more megapixels! What if I get it and it doesn't work? I don’t want to get ripped off!

I understand. With how much used gear can cost it can still be a scary investment but when done right you can save a ton of money that you can put towards more gear! So here are my tips to picking the right used gear so you don’t get burned and can save a ton of money.

Where to buy? I’ll be honest. I have personally spent close to $20,000 on used gear on ebay that I have used in my own personal wedding photography business and have never had a problem. But I was diligent and followed a few rules. I knew what I wanted, I knew what to look out for, and I knew that if it looked too good to be true, just pass it up. No matter the savings the headache is not worth it if the equipment is bad. So should you eBay? I’d say no. If you’re making your first used camera decision I HIGHLY recommend you go to a local camera store to put your hands on a camera to check the condition and be able to ask questions about the model before you buy.

If you don’t want to deal with a seller on ebay or amazon and want to purchase used gear from a reputable online photo dealer, check out KEH.com. Buying and selling used photography gear is all they do and they are the best at it. They have a huge range of DSLRs, mirrorless, and film camera models to choose from.

CLICK HERE TO CHECK OUT KEH.COM the most reputable online source for used and second hand Camera’s and lenses.

A local camera store's reputation is on the line and if the camera does not meet your standard or expectations, or it fails you should be able to return it with no issues. In-person will always be the best place to buy used gear if possible. But whether you're looking online or in person, here are my tips to buying used gear.

Cameras:

Know the camera before making a decision.

There is no denying that photographers love new gear, but the difference between a Nikon d3200 and a Canon 1Dx MkII is more than just $4000. From the camera sensor and LCD screen there are a thousand different features that make these camera bodies different. They are designed to do two completely different tasks depending on what the photographer has in mind. The 1Dx MkII can survive arctic temperatures, sudden downpours, and a mechanical shutter lifespan of over a half-million shots. The Nikon d3200 on the other hand would struggle to make it to a shutter count of 100,000. So when looking at a used camera with 200,000 shutter actuations, the camera could be the difference between moments away from death and years of shooting left in it. This is why knowing the camera is pretty important.

Scratches and scuffs.

When I bought my first used digital camera I would skip right over any camera with a scratch or scuff marks. I thought it must have fallen or been hit but after owning many cameras I know that my flash rubbing against the camera in my padded protected camera bag can cause wear. This does not mean the camera is trash. If you can get a good look at the area, inspect it to determine if it's simple wear or something worse. Around the top of the camera where the flash is mounted, the bottom of the camera where it is connected to a tripod, on the side where the camera may rest on a camera belt are all super common places for a slight mark to shot up that should not be a concern or reason to avoid it. As long as you can ensure there are no gashes or screen damage I would say the camera should be just fine.

Lack or warranty.

This is one of the biggest concerns, if something goes wrong what do you do? While this is is a risk, if you buy from a local camera store or a reputable online retailer like KEH the odds are, they have a policy in place where they will take care of the issue or defects. But when buying items from an auction site like ebay or even in person from an individual on craigslist if something goes wrong you will have a much harder time getting the issue fixed. This is where the price of the camera and your willingness pay a repair shop to get the issue fixed comes in. It’s just a choice you will have to make for yourself.

Lenses:

The rubber will tell a better story than the glass.

The quality of a second hand lens is judged on more than just the glass it shoots through. On higher-end lenses models the glass is extremely strong and is not likely to scratch. Meaning a lens may have been abused but because the glass is so good you may have no idea. The rubber on a lens is a much better indicator of a lens's use. It’s much more pliable than glass. Look for loose-fitting or stretched rubber. How much play is in the zoom ring? The rubber should all be nice and tight. Sure the rubber could be replaced but the actual rubber is not on trial here. The rubber is just an indicator of how the rest of the lens was treated. So replacing the rubber may only solve a very small issue with the lens. If you can get your hands on the lens be sure to try out the focus and aperture rings to ensure they rotate easy and then take some photos to compare lens sharpness.

Scratches, dust, and fungus!?

When looking at a used lens, you don’t want to see a lenses glass with scratches, mold, dust or fungus. These can be bad signs. I would honestly stay away from a lens where the glass is scratched or you can visibly see dust and fungus inside. However if you are on a tight budget and need a specific lens, and the one you can afford has a tiny scratch on the glass. I might not be turned off. You would be surprised how much of a scratch it would take on a lens to affect your picture quality. Honestly. So try and mount the lens on a camera body. Take a few photos and look at them on a computer. Then determine for yourself if you can notice if the scratch shows up on the image. If not… excellent! Depending on the price, you might just save yourself hundreds of dollars

Remember that scratches are different than normal wear on a lens.

Where a lens mounts on your camera or on larger lenses where it mounts to a tripod or a paint scuff are not things I would worry about too much. When people spend a lot of money on a camera or a lens they typically try to take really good care of it so the life expectancy is longer. So follow these tips to buying used gear and your fear of getting burned or wasting money should be gone!

If you want to save money and buy quality used second hand camera gear,

CLICK HERE TO CHECK OUT KEH.COM the most reputable online source for used Camera’s and lenses.

But after all of this, the camera will not make you a great photographer. It can only do what you tell it. You might get the same results from a $400 used camera as you would a $4000 new camera. If you want to grow your skills as a photographer you need education.

Want More Photography Tips to Grow Your Skills?

The 5 Photos You Need To Tell Any Story

young boy waiting for muffins to bake in the oven

Photography is a wonderful tool for storytelling. In photojournalism, you aim to tell an entire story in 1 frame so it can go on the cover of the Sunday paper. This is an excellent goal to strive for. I often see photographers new in their journey not giving enough context. It’s cool that you took a photo of someone with a sword but… why do they have the sword? Is it a performance? If so where is it? Is it just a costume? Or is there a man who thinks he’s a ninja and is terrifying people on the street? All of those instances bring up a completely different response on the viewers part.

Sometimes telling the whole story in a single frame is tough though! This is where a photo essay opens a whole world of possibilities. But just like a traditional essay, there are a few things you need to cover in order for it to still be interesting and compelling. Today we are going to go over the 5 photos you need to take for any photo essay.  

Blueberry muffin mix and ripe bananas

1: The Establishing Shot.

This is the shot in movies from the outside of a house where the characters are inside plotting a bank heist, or the shot inside of a busy dimly lit restaurant where a couple are having their first date.This shot is important to give you context of where the action is taking place. For you this may be a wide shot of your kitchen with your child on a stool in front of a mixing bowl. It lets the viewer know where the action is happening and gives them a taste of what’s about to happen.

child gathering ingredients to bake muffins

2: The Medium Shot.

Now that we know where the action is happening with the establishing shot, the medium shot gets closer to tell us WHO is participating in the action. This could be a waist up photo of your child with spoon in hand mixing away or adding in the chocolate chips into the cookie dough. On top of showing off who is participating in the action try and show off more of the action itself.

child mixing muffin mix in bowl

3: The Close Up

Ahhhh the infamous close up. This is the shot that can make or break the entire photo essay. We as humans are trained to look at and read other humans reactions. When someone is sad, you know they are sad. When someone is happy, you know they are happy. When someone is screaming with labor pains we feel sympathy. The close up gives our brains the info it needs to make a decision on how we should be feeling about the situation. So get close and pay attention to your backgrounds. Make sure the eyes go right to your subject and not to the mess in the background. Don’t be afraid to wait for the right moment. The look of anticipation for the cookies baking while illuminated by the glow from the oven light while looking through the glass. This shot should take you the most amount of time to capture.

muffin mix going into baking tray

4: The EXTREME Close Up.

I find this best used for details. Flour that spilled over into a tiny pile when your child missed the measuring cup. The dough on your child's fingers that they can’t wait to lick off. The measuring cup filled to the brim with milk or knife next to the stick of butter. These photos may not tell the whole story but the context they provide will be the icing on the cake (and no one likes un-iced cakes).

young boy eating a fresh blueberry muffin

5: The Pay Off.

This shot is not always self explanatory as it does not dictate where the camera should be placed. Personally I like mine a bit wider than a close up. Sometime this is the reaction to the first bite of the cookie, other times this is a shot of just the cookie on the counter with a single bite taken out of it. Sometimes this is a photo of the freshly swaddled newborn baby, other times it is photo of the babies info of height, weight, name, etc with the family in the background. The pay off can be left up to interpretation and I love that.

What I love so much about this list is that no matter your skill level it gives you something to shoot for. Often when starting out, you can get so overwhelmed about what to shoot that you can take a million photos and still feel like a story is not being told. But if you try diligently to capture these 5 photos you will be sure to grow your skills of storytelling through your photography.

Want More Photography Tips to Grow Your Skills?

How To Take Good Photos

You bought a DSLR because you want to take better photos that what you can take with your cell phone. I’m guessing you opened your new camera, started taking photos and were a bit underwhelmed right? Thinking “Why isn’t this camera taking good photos!?” Today I’m going to show you how to take a good photo.

Photo by Flickr User Gabriela Pinto

Photo by Flickr User Gabriela Pinto

Disclaimer: There is no magic button, secret menu option, or simple fix that will make you take a good photo. It takes work, and I’m going to show you the steps you need to take to put in that work and ask yourself why you want to take good photos. So if you are not interested in working hard for something you want, you can just leave now. If you are still here, you made the right choice and this time next month or next year from now you will be so proud of yourself.

1: Take More Photos

Have you seen that movie MoneyBall with Brad Pitt? Pitt plays the general manager of the Failing Oakland A’s looking to turn the team around into a winner. Jonah Hill the assistant general manager suggests not swinging to get a homerun every time but to simply just get on first base. The more batters at the plate who are able to get on first, they will advance the rest of the team home, scoring runs, winning them the game. This is the same strategy. There is no need to swing for the fences here. Simply by taking more photos you are increasing your chances of getting a keeper!

So bring your camera with you everywhere. Shoot everything. See what the world looks like at a high angle. See what the world looks like from a low angle. See what the world looks like when you get super close to your subject and completely fill the frame. See what the world looks like when you take 10 steps back and give context. Play with composition. Do you like how your photos look when you keep your subject directly in the center of every photo or do you like them better off to the right? The more photos you take, the more keepers you will get. Just be sure to be deliberate about the photos you are taking and not just squeezing the shutter button hoping for the best.

2: Learn What Your Gear Can Do

Your camera might not feel like it, but it’s an amazing piece of equipment when you know how to use it correctly. Entry level camera gear does have some limitations though. So go out and find those limits. Test all the autofocus modes and find which one works best for portraits, landscapes, moving subjects, everything. Only when you know what your camera can’t do, can you know what your camera CAN do. Then play to your cameras strengths. If you know your camera won’t focus on a subject when the sun is right behind them, you will know that before you take the photo you have to side step to get a better angle that you camera will be able to excel in. Gear will never make you a better photographer. It can only make your job easier.

3: Visit A State Park, Zoo, or on Vacation

When you put yourself in settings you are not familiar with your brain will be firing on all cylinders. You will have a heightened sense of awareness to things you may have not seen before. On top of that these places often offer scenery you are not use to seeing and let you capture unique photos while practicing with your camera becoming more confident and comfortable with your buttons and settings. If you’re on vacation try to take a day excursion. Photograph your kids building sandcastles, your dog catching a crab, that beautiful waterfall or field of sunflowers on the side of the road.

4: Educate Yourself

You have been bringing your camera with you everywhere you go, you have been snapping thousands of photos and you can see your photos are getting better but you feel like you have hit a wall. You have got as good as you can by just being self taught. You’re ready for the next step. Education. 10 years ago the only photography education was in person or in books. Today because of the internet we have soooo many more resources. From Youtube tutorials, Blog posts, and obviously Podcasts, there is no shortage of photography education on the internet. I personally love watching youtube tutorials. Seeing what is happening makes more sense to me than trying to imagine it. But podcasts offer something unique and different. Since Podcasts are audio and you can’t see images podcasts usually focus on the story or experiences of other photographers to help you grow. Because even though knowing your camera settings is essential, a photo is more than the sum of its settings.

If you are looking for a list of the 21 top photography podcast, check out this list by Fuel Your Photos! CLICK HERE!

5: Share Your Photos

I don’t mean just to post them on facebook or instagram. That’s important too, sure, but you want to share your photos in a way that you will get constructive criticism. No matter how good or bad your photos are your family will always give you a biased review because they love you. To grow it is important to get feedback from others. Preferably other photographers. They will have an eye for detail and composition and be able to give you actionable feedback. Sometimes all your photo needs to take it from eh to wow is a simple crop or white balance change. Join Meetup.com and meet other local photographers. Become apart of the community. As a bonus, they often have fun photography outings! If you are not ready to meet in person, join a facebook group or two. Really find one that is compassionate and understanding that every photographer is on a different path in their journey but we are all learning. That's the exact community mindset I have built with the Beginner Photography Podcast Facebook group. A Safe place where no one is going to belittle you or tell you your photos are garbage and walk away. It is full of love and support no matter how much you know or don’t know about photography.

If you are interested in joining the Beginner Photography Podcast Facebook Group, CLICK HERE

6: Experiment

Now that you have been educating yourself from other podcasts, youtube videos, and various blogs, and you have been sharing your work with your in person or online community it’s time to break out of that cocoon and spread your wings creatively. This is where you start to experiment with new techniques or photo ideas. Just as shooting in new or foreign locations can open your mind to new ideas and processes, experimenting with your photography will do the same. Try shooting at night. Find the challenges and learn to overcome them. Just because there is no light does not mean you can’t create any. Learn to use your flash in the day time to overpower the sun or backlight your subject. Or remove light and learn to master the silhouette! Rent a new lens to see what it can do. If you have all zoom lenses, rent a prime lens (A lens that does not zoom. It’s only one focal length) Rent a really wide angle lens. Use a long exposure. Long exposures let in more light, so they are a must for night time. Shooting a long exposure during the day can completely transform the way you see the world. Try shooting a creek, beach shore, or clouds with a long exposure like 3-5 seconds and you could be amazed. Do something that you are not use to doing, to get a new perspective and keep those synapses firing!

7: Start Editing Your Photos

Recently in the Beginner Photography Podcast Facebook Group we had a discussion on editing. Some members thought that editing your photos is not true photography as you should be skilled enough to capture the image you want with just the camera. There is some merit to that. The better a photographer you are, the closer to perfect you can get a photo “in camera” (meaning without editing). But if we look back to the film days photos were still edited. You could change the look of a photo by changing how long the film is in the developer liquid for. This is a form of editing. But editing is not full manipulation. Often times I make simple edits to put my signature on my photos. I like my greens to look more forest-y than lime-y. I like a but of extra contrast. I like my photos slightly overexposed. These things are not completely altering the integrity of the photo but mixing mistakes or putting on a signature.

Once you have completed all of these steps you should be able to consistently take a good photo. Maybe not every photo will be good, hell I’ve been shooting for more than a decade now and still look at some of my photos and wonder what I was thinking. But I take a ton more keepers now that I did when I first started. Photography is a lifelong journey, not something you can master in a weekend or even a decade. I hope that by continuing to grow my skills as a photographer that this time next year I will be taking even more keepers than I am today, and that process will continue forever.

Want More Photography Tips to Grow Your Skills?

GEAR REVIEW! Tenba Solstice 20L Camera Backpack

If you have ever been in the market for a camera bag/backpack you know that there is no shortage of options. There are so many camera bags/backpacks on the market that when it comes time to purchase one, you may wonder which camera backpack to buy? It’s important to know what you want out of your camera bag and how you will be using it, to know which bag will be right for you.

camera-backpack-review-blog

Today I am reviewing the Tenba Solstice 20L Camera Backpack. A camera backpack for the adventurer who loves to get outdoors no matter the weather and capture incredible images. Note, Tenba did send me the backpack in exchange for an honest review. I will be giving the bag away to one of our listeners through a photo contest held in our Facebook group. (If you are interested in joining and participating in the group, click this link and you could win cool prizes too!)

*UPDATE! A WINNER WAS CHOSEN!

Specs:

The Tenba Solstice comes in 3 sizes. 12L, 20L, and 24L.

The 12L can fit A Mirrorless or DSLR camera with 2-4 lenses (up to 70-200mm 2.8) as well as a DJI drone like a Mavic Pro/Air or Spark, and an iPad mini.

The Tenba Solstice 20L can fit 1-2 DSLRs with 4-6 lenses (up to attached 70-200mm 2.8) as well as a DJI drone like a Mavic Pro/Air or Spark, and a full size iPad.

The Tenba Solstice 24L can fit 1-2 DSLRs (up to Pro size with grip/booster) with 5-7 lenses (up to attached 70-200mm 2.8) as well as a DJI drone like a Mavic Pro/Air or Spark, and a 13” Laptop.

Who is the Tenba Solstice for:

This Solstice is great for the more advanced photographer with a mirrorless, prosumer, or full frame body and a few lenses or flashes they want to bring on a trip or vacation where they will be outdoors and are worried about unpredictable weather or safety.

Who is the Tenba Solstice not for:

The Solstice would be too much camera bag for someone just getting started growing their kit. And although the quality and construction is professional grade, the Solstice would not be for a traveling photographer who needs to pack more than a days worth of personal supplies in the same bag with their camera. This is a CAMERA bag.

In Use:

This bag does two things very well. Number one, It protects your gear. The Solstice is great at protecting your camera gear from the weather with its durable waterproof material along with its YKK zippers. It also protects your gear from theft with its rear access panel. And number two, the Solstice is incredibly comfortable. The weight distribution, amount of padding and airflow make this one of the most comfortable bags I’ve had to carry for an extended period of time.

Tenba Solstice Camera Gear

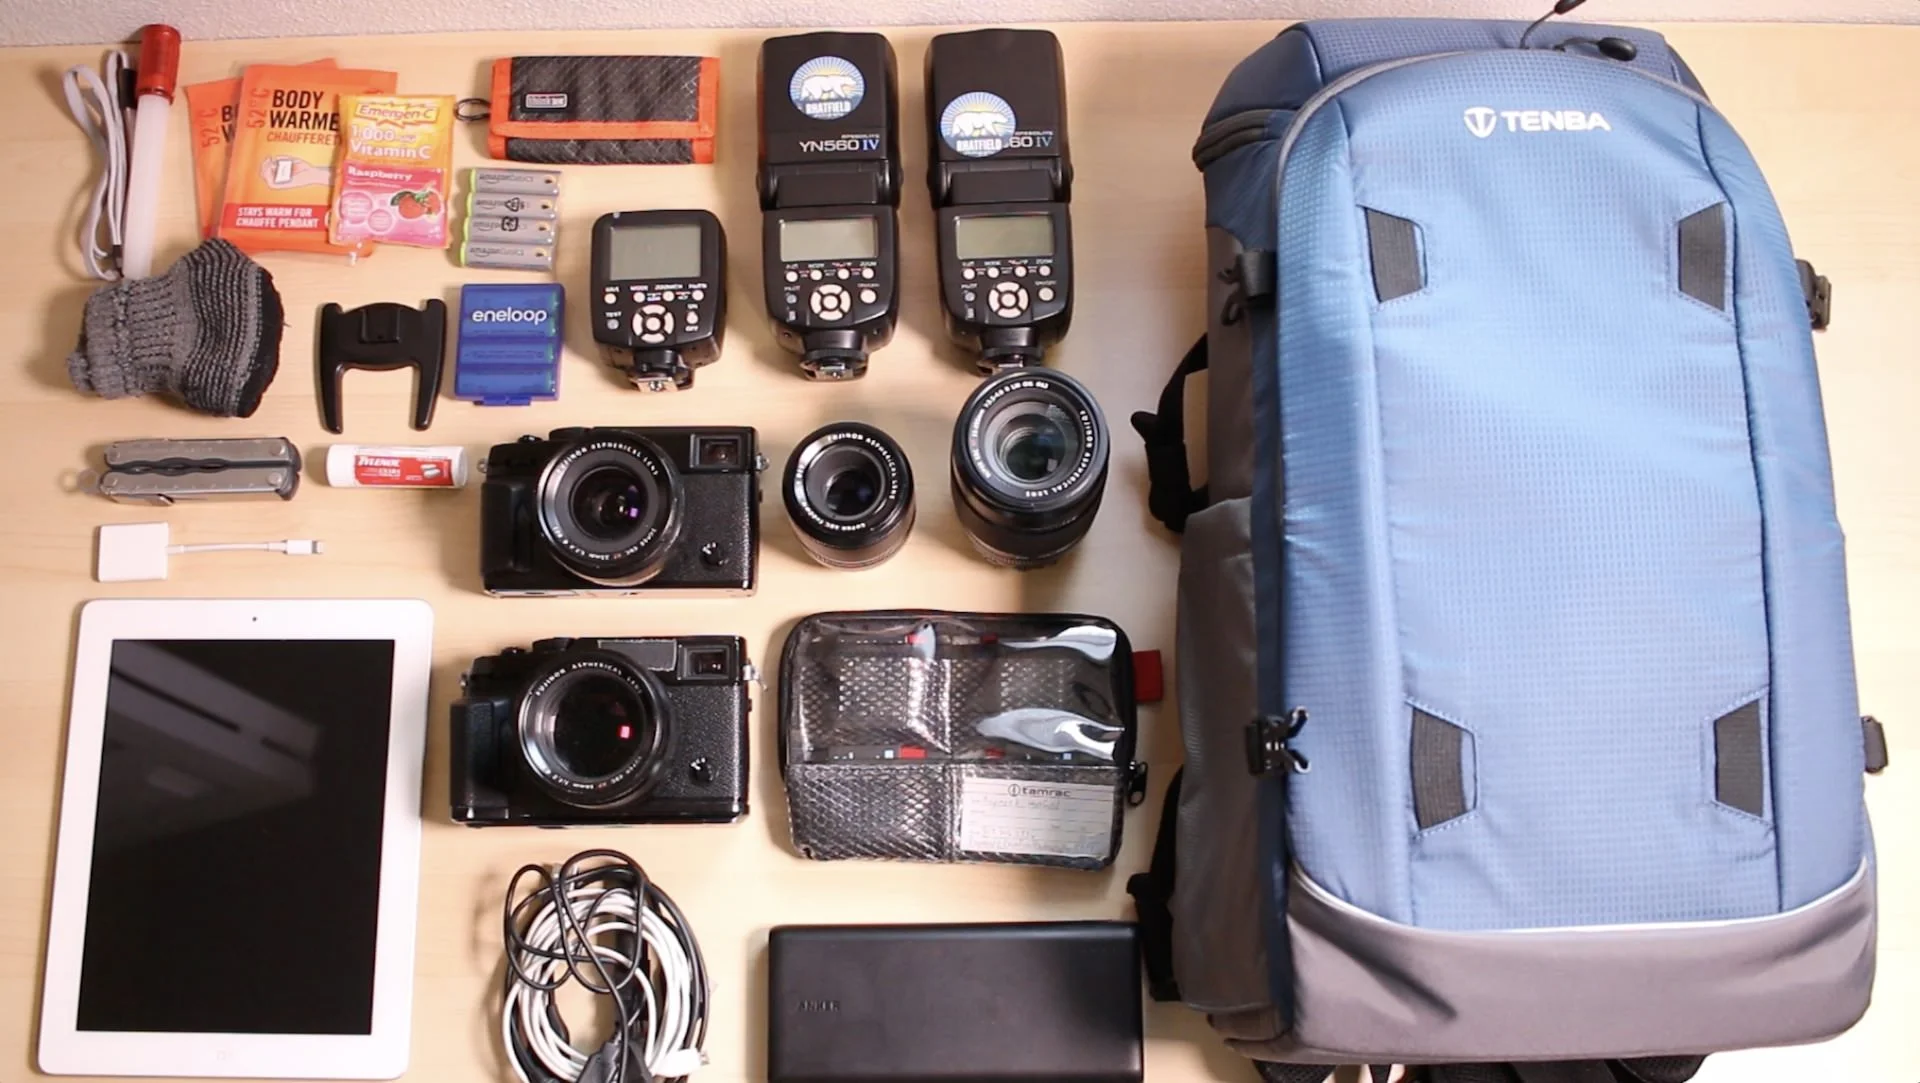
Everything I fit in the Tenba 20L Camera Backpack:

  • 2 Fuji X-Pro 2’s

  • Fuji 23mm f1.4

  • Fuji 56mm f1.2

  • Fuji 60mm Macro

  • Fuji 55-200mm

  • 2 Youngnuo 560IV

  • Youngnuo 560TX

  • Pouch with spare camera batteries and AA’s

  • SD Card Wallet

  • Powerbank with appropriate charging cables

  • Gloves

  • Hand warmers

  • Multi Tool

  • Tylenol

  • Water flavoring packet

  • Chapstick

  • Full Sized iPad

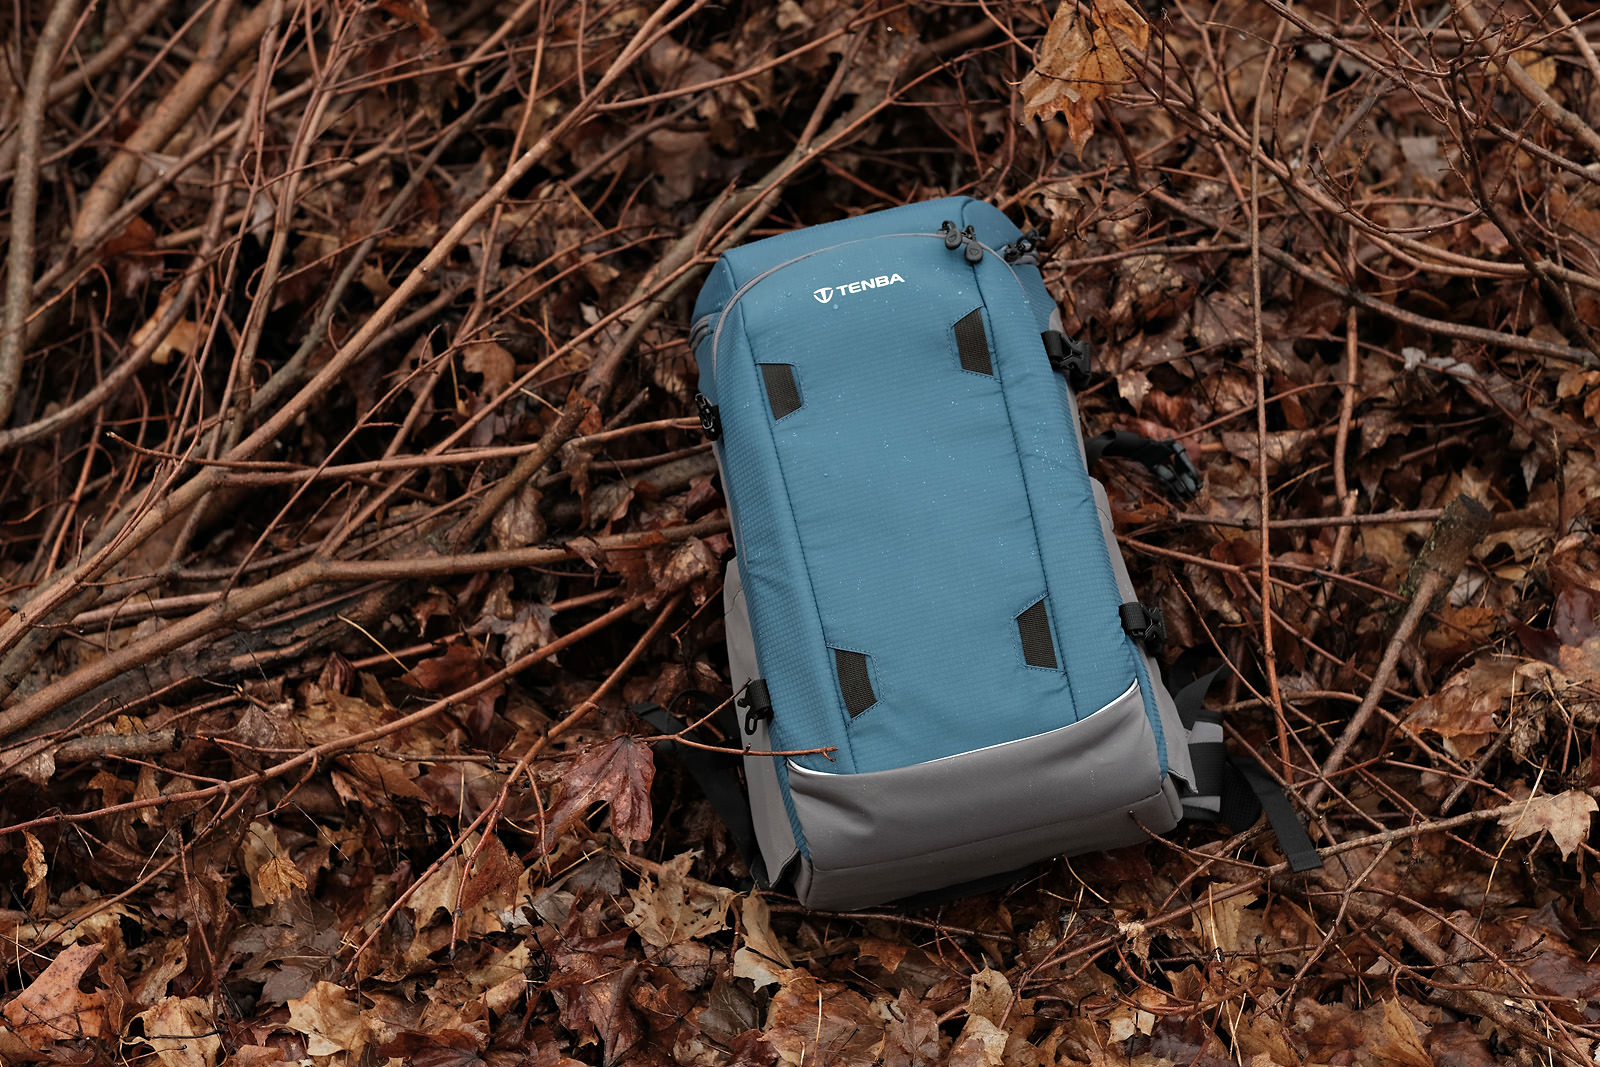
tenba solstice camera backpack in wet brush branches

What I Like About the Tanba Solstice:

I can’t speak highly enough about the quality and comfort. I like how even if I have to set my bag down in a less than ideal conditions the straps stay off the ground and don’t get dirty. I like the rear access. Taking your cameras on vacation increase the risk of having your gear stolen when your not paying attention but with rear access, having your gear stolen out of your bag is a nonissue. I also like the bags reinforced stitching which allows me to turn the bag around while still wearing it, and using the back as a clean workstation.

What I Don’t Like About the Tenba Solstice:

There is a lack of inner pockets and storage for smaller items like loose batteries, lens cloths, rocket blower, etc. There is one zippered pocket inside the bag but it’s in the upper flap that is not easy to get into while you are accessing your camera equipment. And the zippered pocket felt a touch TOO small as putting in my SD card walled, chapstick, Tylenol, a compact flashlight, and a water flavoring packet had filled it to capacity. If you have another zippered pouch you want to add there is plenty of room to toss it in the top flap.

What Might Matter to You:

I have a small 12” laptop that does not fit in the backpack. A full size 10.5” iPad fits great but for a bag that is made for travel, I would think that space for even a small 13” laptop would be a requirement. However, with the number of amazing photo apps for iPads and the increasing number of cameras with built-in wifi to transfer photos, this might not be a problem for you. Note: The Tenba Solstice 24L does fit a 13” Laptop

In Conclusion:

The Tenba Solstice is a great bag for photographers looking to just take their gear out for the day no matter the weather conditions. Although I would not take this bag on a weeklong camping trip to Yosemite because of the lack of additional storage for personal items and clothing. I would take this bag on a weeklong cruise or trip to Iceland where you would be able to keep a separate bag for clothing and extras in a hotel room. Overall I like the Tenba Solstice a lot! It knows exactly what kind of bag it is and does not try to be everything to everyone.

If you are interested in learning more about the Tenba Solstice Click this link to head over to their website. Or click the Amazon links below to pick one up for yourself!

FREE VIDEO! The #1 Secret Learned After Interviewing 118 Professional Photographers over 3 Years - PLUS The 4 Step Roadmap to Becoming Successful

Subscribe to recieve instant access and find out how you can accelerate your photography growth and avoid the same mistake 97.6% of photographers make!

    I respect your privacy and would never share/sell your info to corporate zombies. Unsubscribe at any time.

    4 Ways to Find Your Photography Passion

    photography-passion

    If you read just about any photographers bio I’m sure somewhere it will say they have had a passion for photography since a very young age. If you’re getting into photography later in life this can leave you wondering if you have what it takes or more importantly how do you become passionate about photography because being excited and being passionate about photography are 2 very different things. Today I'm going to show you exactly how to discover your passion in photography in just 4 easy steps.

    First we need to talk about passion. What is passion? Passion is a feeling right? If you have it you have it and if you don’t you’ll know. Wrong. Let’s talk about what passion is NOT!

    Passion vs Excitement.

    You may think they are similar but would you say that you are passionate about finding a coupon for free shipping from your favorite online retailer or would you say your excited about it? Excitement is everywhere! I get excited when I get a free cup of coffee after I have already bought 7 others. But I’m not passionate about it. Passion is not instant. It takes time to cultivate. Be excited about everything you can about photography, but be passionate about one thing.

    Passion vs Dedication.

    If you have ever been on a diet for several months you become dedicated to it. Everything you do somehow revolves around the diet you are dedicated to. Go out with your friends to that new burger place? Sure but you know you will be ordering something you wouldn’t be if you were not watching what you ate. But if you were passionate about eating healthy and you went out with friends you may still make a bad decision because enjoying the social setting with your friends is more important in this moment than saving a few hundred calories in the long run. Passion is merely the catalyst and dedication is what keeps you going.

    Photo by Flickr User Joey Yee

    Photo by Flickr User Joey Yee

    So there are 3 levels of joy here. Excitement, Passion, and Dedication. Excitement is everywhere and the joy can go as fast as it comes. You can even be excited several times a day. Passion is the next step you think about hard and often. You become curious about it and seek out the answers. You may only become passionate about something once a year. Dedication is a whole other beast. You dedicate your time and your life to 3 or 4 things in your entire lifetime. They are rarely physical and often ideas or practices. Like your faith or your partner.

    Why is it important to find your passion in photography? Well it lets you control your time. If you have a day job please don’t get into photography for the money. The desire for money will lead you into taking shitty gigs just because they come with a paycheck. You will become so unhappy with what you shoot and grow to resent photography. You may have got into photography as a way to leave your full time job and that’s fine, but think of your job and the paycheck as a lifeline. A way to fulfil yourself creatively and shoot only the things that excite you.

    Photo by Flickr User Airman Magazine by J.M. Eddins Jr.

    Photo by Flickr User Airman Magazine by J.M. Eddins Jr.

    So now that we know what passion is not and why passion is so important let’s talk about how to cultivate and find your passion within photography.

    1: Learn As Much As You Can

    Chances are, right now you’re extremely excited about photography but you would like to become passionate. You’re looking for an area to focus on and dive headfirst. But you don’t know what you don’t know so step 1 is to learn all that you can. We all know that youtube is a powerful platform to learn just anything you can imagine but I would suggest giving Creative Live a try. They offer hundreds of in depth courses on anything you can imagine related to being a creative. They are all for sale BUT 24 hours a day they run multiple courses for free. With creative live you know your course with be in depth and be taught by a professional in their field. Which can’t always be said for Youtube.

    2: Don’t Shoot What Doesn’t Interest You

    Photo by Flickr User Peter Roome

    Photo by Flickr User Peter Roome

    Does everyone tell you that the only way to make money in photography is by shooting weddings but you know that you don’t want to give up your weekends? Then don’t shoot weddings! Check out Outdoor Adventure Photographer Kat Carney. She is a professional photographer who lives out of a converted 4x4 suburban! She’s doing it because she’s passionate about shooting nature and being outdoors. Not because it’s the most popular option. Now I’m not giving you a pass to not be curious. When I first got into photography I didn’t think I wanted to shoot weddings but I gave it a try and fell in love.

    3: Learn When To Move On

    You got into photography because you enjoy it. It’s fun. Not because you felt obligated. So if you ever get to the point where you become bored or no longer into it as you were before, move on. Photography is really something that you can learn and grow with and sometimes what you thought was passion was actually just excitement. When I first got into photography I really enjoyed the idea of macro photography. Being able to see the world in a completely new way was fascinating to me. Almost a decade later, I don’t even own a macro lens anymore because it was not as enjoyable as I had previously thought and it took much more effort to get a great macro photo and I didnt think the pay off was worth it. So I moved on to keep the passion alive.

    4: What Are Good At And What You Enjoy

    Photo by Flickr used Michiel Gransjean

    Photo by Flickr used Michiel Gransjean

    I’m good at math. But I do not enjoy it. I’m not good at speaking other languages but man do I love when I’m able to piece a sentence together. When you take an inventory of your strengths and then pick out what you love to do you may have just found your match made in heaven. I love newborn photography but I’m terrified making a mistake that could hurt a newborn so I don’t do it. I love going to new adventurous places and meeting new people and I’m good at making people feel comfortable and relaxed in front of the camera so engagement and wedding photography is a great fit for me.

    I simply took something I love and something I’m good at and focused my attention on it. This is where passion lives. From here I know what I should be focusing on. Flash photography for weddings is entirely different than high fashion flash photography. Now I don’t have to waste my time learning high fashion photography because that not my passion. 5-10 years from now wedding photography may not be my passion. And if that day comes I’ll be happy I wrote this guide to look back on and continue to grow!

    As you can see being passionate about an area of photography is the only way for it to be sustainable but you have to start somewhere.

    Want More Photography Tips to Grow Your Skills?

    Having More Fun With Your Photos

    Share-photos-blog

    When I first started taking photos I would go out, snap away, come home, edit the photos and then they would sit on my hard drive never to see the light of day again. At the time I thought, I’m not a professional photographer, my photos are probably not worthy of sharing. This was totally the wrong mindset to have and it wasn't until I changed that mindset that I really started to find joy through my photos that lasted longer than it took to edit them. Sharing your photos can not only be a rewarding way of keeping up with friends and family, but can also grow your skills as a photographer.

    My problem always comes when I take a hundred photos of my son’s birthday party, Thanksgiving with the family, or that sunny beach vacation. I don’t want to post all the photos at once to Facebook or Instagram because it’s clunky and no one wants to really spend 10 mins looking through all of your photos. It’s the modern version of a slide projector. So how can you turn your photos into something compelling enough that family and friends will want to see more, all while being fast and super easy to use and share? After all would you want to spend all day editing photos of your son’s birthday that was only 3 hours long? I use Animoto.

    Animoto lets you create fun video slideshows quick and easy. They have a ton of video templates and access to thousands of songs to add some flair. If you have ever dragged and dropped files on your computer you can make an amazing slideshow with Animoto in just minutes. Here are some examples of videos I have made to share on Facebook. These slideshows took less than 15 mins to create using the Animoto app (available on iOS and Android) which means I was able to share our fun time with the world in less time that it took to drive home!

    But as much as I love Animoto, there are a few things I don’t care too much for. I also create slideshows for all of my weddings and engagement sessions (again I can make them in minutes and my clients go crazy for them) but one thing that bugs me the most is that for a few templates the photos you upload get a filter applied to them to match the video template. This does not bug me if I’m just sharing photos of my family outing but it bugs me when I go to upload wedding photos that I have already edited as applying a filter to an already edited image can create a photo that looks a bit overrated. While I have never had a bride complain and it might just be me being too over controlling it is something to be aware of. It would be great if there was an option to turn off the filter being applied. But if you can look past that, Animoto is the most fun you can have with your photography!

    If you’re interested in trying out Animoto click on my affiliate link below and get one month for free to try it out so you can make great videos, easily!

    Click Here to get 1 Month of Animoto for Free!

    This blog is not sponsored by Animoto, I was not paid by Animoto to create this information for you. These opinions are my own! I truly enjoy using Animoto and I think you will too!

    The Complete Guide To Great Travel Photos: DSLRs

    Traveling is the one thing everyone wishes they could do more of. So When you get to travel you want to make the experience last and a great way to do that is through photography. Having the ability to relive your travels through your photography can bring you joy years after you return home. You don't want to take the same boring vacation photos as everyone else. You're a creative and want to showcase your abilities so when you're showing off your vacation photos to family and friends they feel like they were right there with you. So here are my top tips to getting incredible travel photos with your DSLR. 

    Colorado Springs Hike

    Colorado Springs Hike

    1. Tell a story

    A photograph will retain information better than our brains will so get as much info in each photo as possible. Get try to get at least 2 the 5 W's in each photo. Who What When Where Why. Most of the time the WHY being most important. Who you are with and Where is the easiest. Tell the When and the What if you're going to a festival. Combining multiple W's will always make your photos more interesting and compelling to look at for others.

    Who, What, Where. Friends Hiking in the Mountians.

    Who, What, Where. Friends Hiking in the Mountians.

    2. Pack Light

    When on vacation I often just bring one lens with me. More often than not its its a prime too. The flexibility of a zoom lens is great don't get me wrong but You still want to enjoy yourself and be in the moment. The weight of a zoom lens is just not worth it to me. It could be for you if you are going to a more scenic location or large event. I might pack one flash with me for getting creative shots but more often than not It gets left in the bag. My bag just has the camera, lens, spare memory cards, an extra battery, and a lens cloth. Most of that could fit in my pocket if I wanted it to. I ultimately want to enjoy as much of my vacation as possible and not have to worry about the excessive amount of gear I could bring. 

    3. Don't forget the details

    What makes travel so great is seeing how different the rest of the world is. If everywhere was just like the town you live in than travel would now be that cool. So figure out what makes that place so unique. Is it the beautiful mountains, is it the incredible food, or is it just great friends? You are telling YOUR story so focus on what makes the place so great to you! You don't have to reinvent the wheel here. Go ahead and take a photo of the leaning tower of piza along with the million other people. But make it your own. Try a unique perspective.

    Details like where you are give more context

    Details like where you are give more context

    4. Take some video!

    "But Raymond this blog is about taking better travel PHOTOS" Ask yourself WHY are you taking photos? To relive an experience. Photos can be great for that but sometimes you can tell part of a story quicker with video. Thats why Youtube is the number 2 search engine in the world and Flickr is not. Every DSLR that has come out in the past 5 years has the ability to record great video. Just take a few seconds of every day life in this place. People walking, the cool shops, the locals. Keep your clips short. 10 seconds will be enough. But what are you going to be doing with all of these video clips?? Funny you should ask 

    5. Put it all together!

    Here is your chance to tell the whole story and not just the bits and pieces with each photo. If you want the ultimate control bring all of your photos and videos into a program like Adobe Premiere or even Apples iMovie. While you will get the control and flexibility with both of those programs they will take up a good chunk of time to create the final video. Thats why I use Animoto for the majority of my videos. Their easy to use drag and drop interface and video themes makes creating incredible fusion slideshows simple and painless. The last night of your trip you can easily make a video of the whole vacation to share with family and friends back home on social media. I made this video below simply with iMovie as I wanted a bit of creative control with the music and the drone shots. This video contains more than just DSLR footage but you get the idea. It took about 5 hours to put together. 

    Uploaded by Raymond Hatfield on 2017-03-31.


    6. Back up your photos.

    If the point of taking photos is to be able to relive your memories then backing up your digital photos so you don't lose them forever is essential. If you're able to travel with a laptop bring along a slim portable 1tb external drive to back your photos up to. If you're not able to travel with a laptop there are a lot of great wireless hard drives that let you back up memory cards to. My recommendation would be the WD My Passport. It has a ton of storage, a fast usb 3.0 connection, and is under $100. Score 

    Taking these photos so you can remember your trip later is the goal here. So don't get so wrapped up in taking every photo you can think of or perfecting your technicals that you don't actually make any memories of the trip yourself. Follow these tips and you will be sure to get great photos on your next adventure! 


    Recent Posts to grow your photography skills!